Quantcast
Channel: Citrix – Govardhan Gunnala
Viewing all 57 articles
Browse latest View live

Proof of Concept: Running Apple MAC OS X on Citrix XenApp

$
0
0

Having known that it’s a long await for the industry to see the MAC licensed for virtualization, I’ve come up with an hybrid setup that enables one to connect run MAC OS X on Citrix XenApp sessions.


POC Components involved:

  • MAC OS X client system running on MAC hardware
  • Citrix XenApp Infrastructure, with network access to MAC OS X system
  • XenApp application server with PowerShell and UltraVNC Viewer installed

Technical background:

  • MAC OS X license EULA terms doesn’t restrict running MAC OS on virtual systems for business/commercial purposes
  • Many of the MAC users have requirement to have remote access to their MAC systems to enable mobile working primarily from public places that run PCs/Windows
  • There couple of ways you can connect to a MAC system from Windows PCs, I am going to use UltraVNC Viewer here
  • By connecting to MAC OS X systems via VNC from a XenApp server, you can publish an application that runs the UltraVNC which in turn will connect to the MAC OS X

Automation:

UltraVNC Command Line Syntax:

"C:\Program Files\uvnc bvba\UltraVNC\vncviewer.exe" -connect <MAC SysName> -password <MacLoginPwd> /fullscreen


UltraVNC Command Line embedded in PowerShell: (save as C:\Scripts\Launch-UVNC.ps1)

$exe = "C:\Progra~1\UVNCBV~1\UltraVNC\vncviewer.exe"
$args = "-connect <MAC SysName> -password <MacLoginPwd> /fullscreen"
$cmd = "$exe $args"

Invoke-Expression $cmd


Implementation:

On MAC OS X System:

Configure MAC to allow remote user logins: by using below commands as shown:

Apple Start Menu > System Preferences > Sharing > Select “Remote Login” and set Allow access for “All users”

image

On XenApp Server:

Publish a XenApp application say XA-MACOSX

Configure it to run above create PowerShell script as shown below:

image

Login to Web Interface and launch the XA-MACOSX

image

You’ll see a VNC session to the MAC OS X as shown below:

image

Login to the MAC and enjoy working remotely via reliable ICA session backed from XenApp.

image


Filed under: Apple, Citrix
Software to test your GPU (Graphics Processing Unit) OpenGL, OpenCL, CUDA and their Sharing capabilities

$
0
0

Geeks3D’s softwares

All the following softwares are active projects and are regularly updated.

GLSL Hacker, pixel hacking with GLSL, Lua and Python under Windows, Linux and Mac OS X

GLSL Hacker

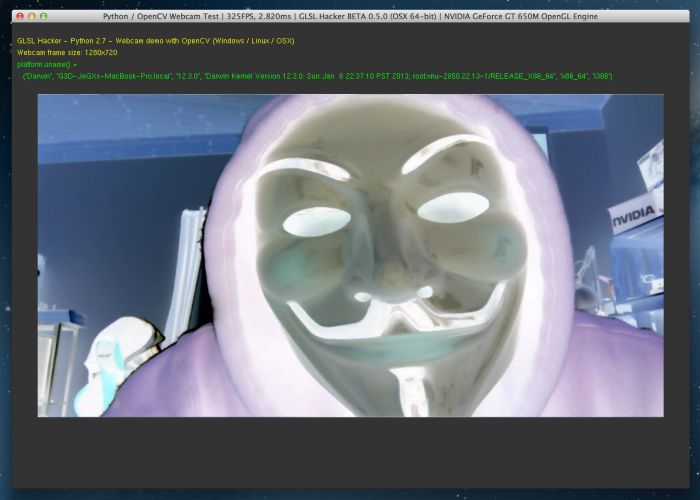
GLSL Hacker is a demotool for pixel hacking with GLSL, Lua and Python under Windows, Linux and Mac OS X. It takes its roots from GeeXLab.
- GLSL Hacker homepage
- Latest version
- All GLSL Hacker related news

GPUTest, cross-platform OpenGL benchmark

GPUTest

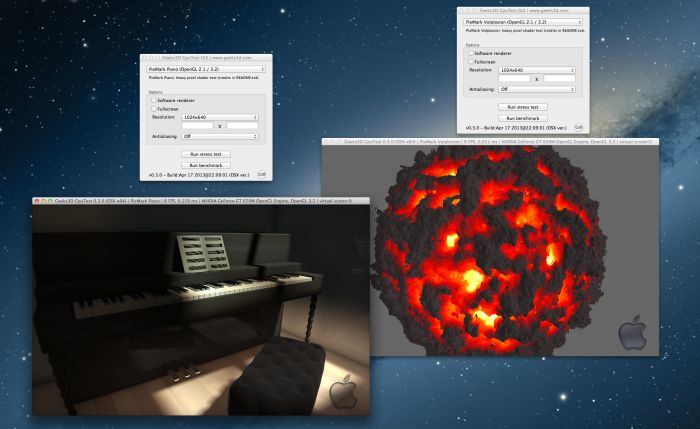
GPUTest is a suite of cross-platform OpenGL benchmarks for Windows, Linux and Mac OS X.
- GPUTest homepage
- Latest version

GeeXLab, real time 3D programming

GeeXLab

GeeXLab is a demotool for quick coding and prototyping of real time 3D scenes using XML, Lua, Python and GLSL.
- GeeXLab homepage
- Latest version
- All GeeXLab related news

FurMark, VGA stress test, GPU burn-in utility and OpenGL benchmark

FurMark

FurMark is a popular VGA stress test (graphics card burn-in test) as well as an OpenGL benchmark.
- FurMark homepage
- Latest version
- All FurMark related news

TessMark, OpenGL 4 tessellation benchmark

TessMark

TessMark is an OpenGL 4 tessellation benchmark for NVIDIA GeForce GTX 400, GTX 500 and AMD Radeon HD 5000 and HD 6000.
- TessMark homepage
- Latest version
- All TessMark related news

FluidMark, PhysX fluids and OpenGL benchmark

FluidMark

FluidMark is a PhysX-based fluid simulation benchmark with an OpenGL 2 rendering.
- FluidMark homepage
- Latest version
- All FluidMark related news

ShaderToyMark, OpenGL pixel shader benchmark

ShaderToyMark

ShaderToyMark is a heavy OpenGL 2 pixel shader benchmark focused on GPU raw power processing.
- ShaderToyMark homepage
- Latest version
- All ShaderToyMark related news

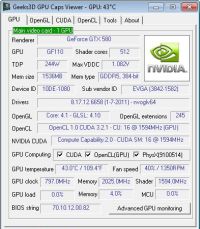
GPU Caps Viewer, video card information utility, OpenGL, OpenCL and CUDA API level support

GPU Caps Viewer

GPU Caps Viewer is video card information utility that gives hardware (GPU) and software (OpenGL, OpenCL and CUDA API level support) details.
- GPU Caps Viewer homepage
- Latest version
- All GPU Caps Viewer related news

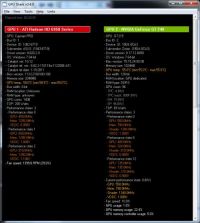
GPU Shark, lightweight GPU monitoring utility for AMD Radeon and NVIDIA GeForce cards

GPU Shark

GPU Shark is a lightweight GPU monitoring utility for AMD Radeon and NVIDIA GeForce cards.
- GPU Shark homepage
- Latest version
- All GPU Shark related news

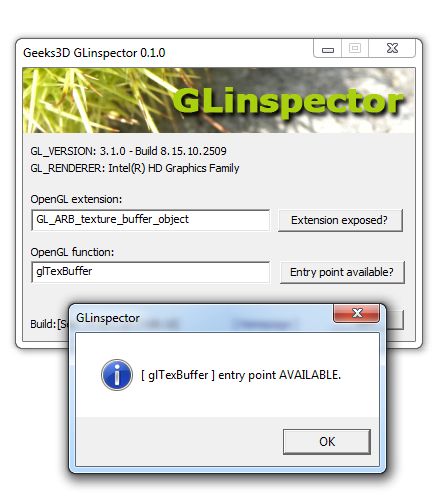
GLinspector, OpenGL extensions and functions

GLinspector

GLinspector is a tiny tool (150KB) to interrogate OpenGL about the presence of extensions and functions.
- Latest version

Other Cool Softwares

The following softwares are based on Geeks3D’s technologies but do not belong to Geeks3D.

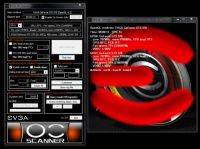
EVGA OC Scanner, GPU stress test and artifact scanner

EVGA OC Scanner

EVGA OC Scanner is a GPU stress test and artifact scanner based on FurMark technology.
- OC Scanner homepage
- All OC Scanner related news

MSI Kombustor, graphics card burn-in test and OpenGL benchmark

MSI Kombustor

MSI Kombustor is a graphics card burn-in test and an OpenGL benchmark, based on FurMark technology.
- Latest version
- All Kombustor related news


By NIVIDIA: http://www.nvidia.com/object/gpu-applications.html?All

Abaqus/Standard
•  1.5 – 2.5x Speed up*
Supported Features
•  Direct sparse solver
Structural Mechanics
Abinit
•  1.3-2.7x Speed up*
Supported Features
•  Local Hamiltonian
•  non-local Hamiltonian
•  LOBPCG algorithm
•  diagonalization /orthogonalization
Computational Chemistry
Accelereyes Arrayfire
•  2-20x Speed up*
Supported Features
•  Fast, easy-to-use GPU software library
•  Supports hundreds of most commonly used GPU functions
•  Available for C, C++, Fortran, and other languages
Defense and Intelligence
Accelereyes Arrayfire
•  2-20x Speed up*
Supported Features
•  Fast, easy-to-use GPU software library
•  Supports hundreds of most commonly used GPU functions
•  Available for C, C++, Fortran, and other languages
Imaging and Computer Visions

Accelereyes Arrayfire
•  2-20x Speed up*
Supported Features
•  Fast, easy-to-use GPU software library
•  Supports hundreds of most commonly used GPU functions
•  Available for C, C++, Fortran, and other languages
Computational Finance
Accelereyes Arrayfire
•  2-20x Speed up*
Supported Features
•  Fast, easy-to-use GPU software library
•  Supports hundreds of most commonly used GPU functions
•  Available for C, C++, Fortran, and other languages
Data Science, Analytics, and Databases
Acceleware AxRecon
•  20-30x Speed up*
Supported Features
•  Image reconstruction
Medical Imaging
Acceleware RTM
•  14X Speed up*
Supported Features
•  RTM algorithm

ACEMD
•  150 ns/day DHFR Speed up*
Supported Features
•  Written for use only on GPUs
Molecular Dynamics
ACES III
•  10x Kernel Speed up*
Supported Features
•  Integrating scheduling GPU into SIAL programming language and SIP runtime environment.
•  In development
Computational Chemistry
ADF
Supported Features
•  Fock Matrix, Hessians
•  In development
Computational Chemistry
Agilent Technologies EMPro
•  6x Speed up*
Supported Features
•  FDTD solver
Electronic Design Automation

Agilent Technologies ADS
•  4x-6x Speed up*
Supported Features
•  Signal integrity simulation
Electronic Design Automation
Altair AcuSolve
•  2x Speed up*
Supported Features
•  Linear equation solver
•  Multi-GPU
Computational Fluid Dynamics
Altair RADIOSS
•  2-4x Speed up*
Supported Features
•  Direct & iterative solvers
Structural Mechanics
AMBER
•  >100 ns/day JAC NVE Speed up*
Supported Features
•  PMEMD Explicit Solvent and GB Implicit Solvent
Molecular Dynamics


Source:

 Softwares – 3D Tech News and Pixel Hacking – Geeks3D.com

GPU Applications | High Performance Computing | NVIDIA


Filed under: Citrix, Electronics-Hardware

Setting up applications using nVidia Graphics Card with GPU Sharing to work in Citrix XenApp environment

$
0
0

First and foremost to understand is that if you are working on a System that has both built-in video card and an added Graphics card with GPU, your system will default to the Graphics card that is on the motherboard. Thus you’ll not be getting any benefits of your added graphics card.

As of this writing, I didn’t find any way/options to instruct/configure a Graphic Card usage for particular protocol say it for either RDP/ICA/VNC whatever all of these just keep using your default graphics card.  Even disabling the card from device manager even will not bring your secondary card to be used.  The only way I found is to make your secondary graphics card as your primary graphics card at BIOS level.


In Short: if you have a default and an added graphics card, you should make your added secondary card as the primary one at the BIOS level.  In other words, secondary graphics card along with default card on the mother board is not supported.


Filed under: Citrix, Windows Technologies

XenDesktop 7 and VMware vCenter 5: New Machine Catalog creation fails with error: A snapshot could not be created from the specified virtual machine

$
0
0

XenDesktop 7 would fail to create new Machine Catalog whenever it fails to create a Snapshot of the chosen VM for Master Image. 

In my case, Snapshot creation was failing as my vCenter server was failing to Connect to the ESXi host due to expiry of license.

image


image

Error Id: XDDS:02C84D06

Exception:
    Citrix.Console.Models.Exceptions.ScriptException A snapshot could not be created from the specified virtual machine: XDHyp:\hostingunits\VMTestCluster1\Win7ENTSP1.vm
       at Citrix.Console.PowerShellSdk.ProvisioningSchemeService.Scripts.SnapshotVMsScript.CreateVMSnapShot(String vmPath)
       at Citrix.Console.PowerShellSdk.ProvisioningSchemeService.Scripts.SnapshotVMsScript.RunScript()
       at Citrix.Console.PowerShellInteraction.PowerShellScript`1.Run()
       at Citrix.Console.PowerShellSdk.ProvisioningSchemeService.BackgroundTasks.SnapshotCreationTask.RunTask()
       at Citrix.Console.PowerShellSdk.BackgroundTaskService.BackgroundTask.Task.Run()
    DesktopStudio_ErrorId : UnknownError
    ErrorCategory : NotSpecified
    DesktopStudio_PowerShellHistory : Create Machine Catalog ‘Win7XD7Pool’
    10/16/2013 10:37:04 AM
    Get-ConfigServiceStatus  -AdminAddress ‘w2k12srv1.rwdc.lan:80′
    Get-LogSite  -AdminAddress ‘w2k12srv1.rwdc.lan:80′
    Start-LogHighLevelOperation  -AdminAddress ‘w2k12srv1.rwdc.lan:80′ -Source ‘Studio’ -StartTime 10/16/2013 5:36:24 PM -Text ‘Create Machine Catalog `’Win7XD7Pool`”
    New-BrokerCatalog  -AdminAddress ‘w2k12srv1.rwdc.lan:80′ -AllocationType ‘Random’ -Description ‘Windows 7 Pooled VMs on XD7′ -IsRemotePC $False -LoggingId d00697df-dcc3-4ae1-abd4-32b1c4b26f49 -MinimumFunctionalLevel ‘L7′ -Name ‘Win7XD7Pool’ -PersistUserChanges ‘Discard’ -ProvisioningType ‘MCS’ -Scope @() -SessionSupport ‘SingleSession’
    New-AcctIdentityPool  -AdminAddress ‘w2k12srv1.rwdc.lan:80′ -AllowUnicode -Domain ‘RWDC.lan’ -IdentityPoolName ‘Win7XD7Pool’ -LoggingId d00697df-dcc3-4ae1-abd4-32b1c4b26f49 -NamingScheme ‘XD7Pool###’ -NamingSchemeType ‘Numeric’ -OU ‘OU=Computers,OU=HYD,DC=RWDC,DC=lan’ -Scope @()
    Set-BrokerCatalogMetadata  -AdminAddress ‘w2k12srv1.rwdc.lan:80′ -CatalogId 1 -LoggingId d00697df-dcc3-4ae1-abd4-32b1c4b26f49 -Name ‘Citrix_DesktopStudio_IdentityPoolUid’ -Value ‘a6b94f53-bf85-4949-a11a-64d12b3b2b6a’
    New-HypVMSnapshot  -AdminAddress ‘w2k12srv1.rwdc.lan:80′ -LiteralPath ‘XDHyp:\hostingunits\VMTestCluster1\Win7ENTSP1.vm’ -LoggingId d00697df-dcc3-4ae1-abd4-32b1c4b26f49 -SnapshotName ‘Citrix_XD_Win7XD7Pool’
    New-HypVMSnapshot : The create snapshot operation failed.
        + CategoryInfo : InvalidOperation: (:) [New-HypVMSnapshot], InvalidOperationException
        + FullyQualifiedErrorId : Citrix.XDPowerShell.HostStatus.FailedToCreateSnapshot,Citrix.HostingUnitService.Sdk.Commands.NewHypVMSnapshotCommand
    Stop-LogHighLevelOperation  -AdminAddress ‘w2k12srv1.rwdc.lan:80′ -EndTime 10/16/2013 5:37:04 PM -HighLevelOperationId ‘d00697df-dcc3-4ae1-abd4-32b1c4b26f49′ -IsSuccessful $False
Inner Exception:
    Citrix.Console.Models.Exceptions.ScriptException The create snapshot operation failed.
       at Citrix.Console.PowerShellInteraction.CmdletExecutionMethods.CreateException[T](ExecutionResults`1 results, ICmdletExecutionHost host)
       at Citrix.Console.PowerShellInteraction.CmdletExecutionMethods.Execute[T](ISdkCmdlet`1 sdkCmd, ICmdletExecutionHost host, Boolean allowFailover)
       at Citrix.Console.PowerShellSdk.ProvisioningSchemeService.Scripts.SnapshotVMsScript.CreateVMSnapShot(String vmPath)
    DesktopStudio_ErrorId : FailedToCreateSnapshot
    Sdk Error Message : The create snapshot operation failed.
    Sdk Error ID : Citrix.XDPowerShell.HostStatus.FailedToCreateSnapshot,Citrix.HostingUnitService.Sdk.Commands.NewHypVMSnapshotCommand
    ErrorCategory : NotSpecified
    DesktopStudio_PowerShellHistory : Create Machine Catalog ‘Win7XD7Pool’
    10/16/2013 10:37:04 AM
    Get-ConfigServiceStatus  -AdminAddress ‘w2k12srv1.rwdc.lan:80′
    Get-LogSite  -AdminAddress ‘w2k12srv1.rwdc.lan:80′
    Start-LogHighLevelOperation  -AdminAddress ‘w2k12srv1.rwdc.lan:80′ -Source ‘Studio’ -StartTime 10/16/2013 5:36:24 PM -Text ‘Create Machine Catalog `’Win7XD7Pool`”
    New-BrokerCatalog  -AdminAddress ‘w2k12srv1.rwdc.lan:80′ -AllocationType ‘Random’ -Description ‘Windows 7 Pooled VMs on XD7′ -IsRemotePC $False -LoggingId d00697df-dcc3-4ae1-abd4-32b1c4b26f49 -MinimumFunctionalLevel ‘L7′ -Name ‘Win7XD7Pool’ -PersistUserChanges ‘Discard’ -ProvisioningType ‘MCS’ -Scope @() -SessionSupport ‘SingleSession’
    New-AcctIdentityPool  -AdminAddress ‘w2k12srv1.rwdc.lan:80′ -AllowUnicode -Domain ‘RWDC.lan’ -IdentityPoolName ‘Win7XD7Pool’ -LoggingId d00697df-dcc3-4ae1-abd4-32b1c4b26f49 -NamingScheme ‘XD7Pool###’ -NamingSchemeType ‘Numeric’ -OU ‘OU=Computers,OU=HYD,DC=RWDC,DC=lan’ -Scope @()
    Set-BrokerCatalogMetadata  -AdminAddress ‘w2k12srv1.rwdc.lan:80′ -CatalogId 1 -LoggingId d00697df-dcc3-4ae1-abd4-32b1c4b26f49 -Name ‘Citrix_DesktopStudio_IdentityPoolUid’ -Value ‘a6b94f53-bf85-4949-a11a-64d12b3b2b6a’
    New-HypVMSnapshot  -AdminAddress ‘w2k12srv1.rwdc.lan:80′ -LiteralPath ‘XDHyp:\hostingunits\VMTestCluster1\Win7ENTSP1.vm’ -LoggingId d00697df-dcc3-4ae1-abd4-32b1c4b26f49 -SnapshotName ‘Citrix_XD_Win7XD7Pool’
    New-HypVMSnapshot : The create snapshot operation failed.
        + CategoryInfo : InvalidOperation: (:) [New-HypVMSnapshot], InvalidOperationException
        + FullyQualifiedErrorId : Citrix.XDPowerShell.HostStatus.FailedToCreateSnapshot,Citrix.HostingUnitService.Sdk.Commands.NewHypVMSnapshotCommand
    Stop-LogHighLevelOperation  -AdminAddress ‘w2k12srv1.rwdc.lan:80′ -EndTime 10/16/2013 5:37:04 PM -HighLevelOperationId ‘d00697df-dcc3-4ae1-abd4-32b1c4b26f49′ -IsSuccessful $False


Filed under: Citrix

Preparing Master VM Image on VMware for XenDesktop 7

$
0
0

Build a new Windows Desktop VM.

Add the system to the Domain

image

Install all the needed Windows updates.

image


Install VMware Tools.

image

image


image

image

image

image

image

image

image

image

image

image

image

image

image

image

image

Create a Snapshot of the VM:

image


Filed under: Citrix

The Machine Catalog could not be loaded due to the following errors: There are no master images associated with this Machine Catalog.

Configuring Citrix StoreFront for XenDesktop 7 on Windows Server 2012

$
0
0

image_thumb[17]

image

image

image

image

image

image

image

image

image

image


image

A quick tweak is to add your site to trusted web sites list so that it will be able to run the JavaScripts.

image

image

image

image

image

image

image

image


Filed under: Citrix

XenDesktop 7: Hosting > Delete Resources and Delete Connection


Overview of Steps involved in setting up XenDesktop 7 on Windows Server 2012 from scratch with VMware ESXi 5.1.0 as Hypervisor

$
0
0


  1. Install Windows Server 2012 with all of the Windows Updates and add it to the Domain.  Refer to Step-By-Step Screencast of Installing Windows Server 2012
    1. Install Updates
    2. Add to the Domain
    3. The XenDesktop installer will take care of installing all of the pre-requisite software on the server along with enabling the required Server Roles and Features.
  2. Install XenDesktop 7 with all of the features on the same server.  Refer to Installing Citrix XenDesktop 7 on Windows Server 2012 image_thumb184
    1. Delivery Controller
    2. Studio
    3. Director
    4. License Server
    5. StoreFront
    6. Along with features XenDesktop will also
      1. installs Microsoft SQl Server 2012 Expressimage
      2. Allows FireWall Rules image_thumb244
  3. Configuring XenDesktop Components: via Citrix XenDesktop Studio
    1. Create a new XenDesktop Site
    2. Install XenDesktop Server License on Controller server, refer to Configuring Licensing section in Configuring XenDesktop 7 on Windows Server 2012
    3. Setup a Connection to Hosting Hypervisor
    4. Prepare a Master VM
      1. Create a VM with all required settings and environment that is going to be used as Master Image for Machine Catalog in XenDesktop
      2. Update/Configure the Network configuration to be able to access the Domain as well as Delivery controller systems
      3. Install Hypervisor Tools (VMware/Xen Tools)
      4. Join to a Domain
      5. Install VDA and Citrix Receiver
      6. Shutdown the VM
      7. Create a Snapshot of the VM
      8. Keep this Master Image VM in shutdown state
      9. Refer to Preparing Master VM Image on VMware for XenDesktop 7
    5. Create a Machine Catalog by choosing the previously created Master Image VM
    6. If you are planning to use NetScalar for your networking and Firewall setup, you need to have it now ready so that youcan configure it in your StoreFront, otherwise you can specify it at a later point
    7. Create and Configure StoreFront site, Refer to Configuring Citrix StoreFront for XenDesktop 7 on Windows Server 2012
      1. As part of which you’ll be installed Citrix Receiver
      2. If you are to access/test XenDesktop session from the same server you’ll need to have the StoreFront site added to IE trusted sites list so that it’ll be able to run the JavaScripts
    8. Have appropriate Active Directory infrastructure setup like OU to store the computer Objects, Users accounts and a group account who going to access the created VMs
    9. Create Delivery Group
      1. choose the Catalog to be used
      2. assign the users group
      3. link the access to the StoreFront site
    10. Users will login from the StoreFront web store site and can start using the resources assigned for their login
  4. Setting up connection to VMWare ESXi 5.1.0 with vSphere 5.1.0
    1.   In order to establish a connection from XenDesktop 7 running on Windows Server 2012 to VMware Host running ESXI 5.1.0, you need to allow both HTTP and HTTPS access using below given steps:
      1. SSH to the vCenter, use WinSCP for GUI based access
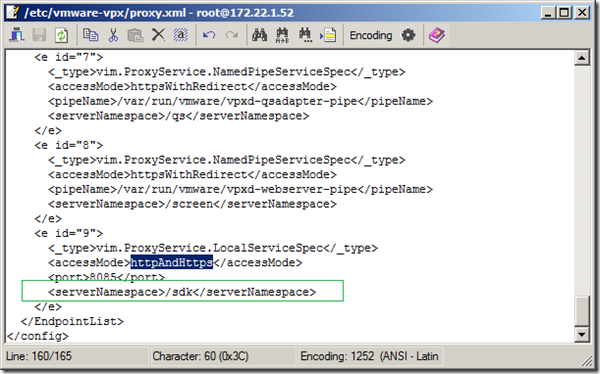
      2. Edit the File /etc/vmware-vpx/proxy.xml
      3. Replace httpsAndRedirect with httpAndHttps for SDK XML tag image
      4. Refer to Fix: Cannot connect to the VCenter server due to a certificate error for detailed list of issues that may arise otherwise.


    2. Ensure proper DNS access to the vCenter system from XenDesktop Controller server so as to make sure the web based SSL access works in order to establish the secure communication channel.
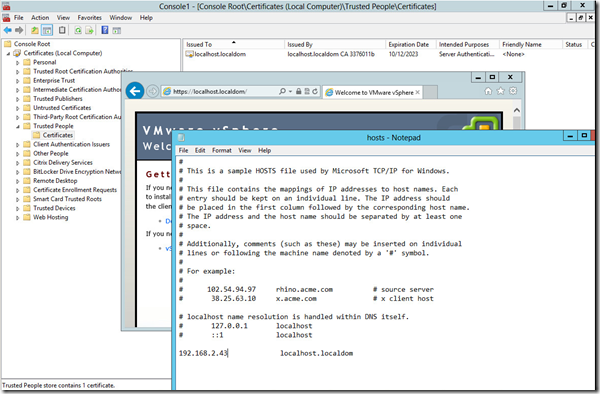
      1. In case if you don’t have a proper DNS setup/network access for any reason, setup the vCenter server DNS name and IP entries in "C:\Windows\System32\drivers\etc\hosts" file as shown below image
    3. Add the SSL certificate of the vCenter server to the Trusted People list for both Local Computer as well as Current User  on XenDesktop 7 Controller Server
      1. To find the certificate navigate to the https://vCenter/
      2. Choose Copy to File option in Details of the certificate
      3. Open MMC, load Certificates for both Local Computer as well as Current User
      4. Navigate to Trusted People > right and Import and browse to the certificate file and click import
      5. Upon successful import you’ll see the certificate as shown below image
    4. On the XenDekstop 7 Controller server, add the vCenter server URL to the  Trusted Sites list. In my lab my vCenter server is localhost.localdomimage
    5. d
    6. g
  5. g
  6. fg

Filed under: Citrix

Sequence of steps that takes places on VMware vCenter System when Citrix XenDesktop 7 Machine Catalog creation process copies over the Base Image VM.

$
0
0

image

Removed XD-Temp-10/22/2013 10:01:49
AM-4caXXXca-0XXX-4XXX-9XXX-62XXXdeXXXX1
info
22-10-2013 10:45:57 PM
XD-Temp-10/22/2013 10:01:49 AM-4caXXXca-0XXX-4XXX-9XXX-62XXXdeXXXX1
vpxuser

Removed XD-Temp-10/22/2013 10:01:49
AM-4caXXXca-0XXX-4XXX-9XXX-62XXXdeXXXX1
info
22-10-2013 10:45:57 PM
XD-Temp-10/22/2013 10:01:49 AM-4caXXXca-0XXX-4XXX-9XXX-62XXXdeXXXX1
vpxuser

Reconfigured XD-Temp-10/22/2013 10:01:49 AM-
4caXXXca-0XXX-4XXX-9XXX-62XXXdeXXXX1
info
22-10-2013 10:45:55 PM
XD-Temp-10/22/2013 10:01:49 AM-4caXXXca-0XXX-4XXX-9XXX-62XXXdeXXXX1
vpxuser

Removed Win7XD7Pool-baseDisk-datastore-49
info
22-10-2013 10:45:54 PM
Win7XD7Pool-baseDisk-datastore-49
vpxuser

Removed Win7XD7Pool-baseDisk-datastore-49
info
22-10-2013 10:45:52 PM
Win7XD7Pool-baseDisk-datastore-49
vpxuser

Reconfigured
Win7XD7Pool-baseDisk-datastore-49
info
22-10-2013 10:45:51 PM
Win7XD7Pool-baseDisk-datastore-49
vpxuser

New virtual machine
Win7XD7Pool-baseDisk-datastore-49 created
info
22-10-2013 10:45:01 PM
Win7XD7Pool-baseDisk-datastore-49
vpxuser

Assign a new instance UUID
(503755c9-64ef-d273-bc98-372a7dda9501) to
Win7XD7Pool-baseDisk-datastore-49
info
22-10-2013 10:45:00 PM
Win7XD7Pool-baseDisk-datastore-49
vpxuser

Assigned new BIOS UUID (42379771-73eb-6e8c-
5615-f1ab693e529e) to  on  in
info
22-10-2013 10:45:00 PM
vpxuser

Creating Win7XD7Pool-baseDisk-datastore-49
info
22-10-2013 10:45:00 PM
Win7XD7Pool-baseDisk-datastore-49
vpxuser

New virtual machine XD-Temp-10/22/2013 10:01
:49 AM-4caXXXca-0XXX-4XXX-9XXX-62XXXdeXXXX1
created
info
22-10-2013 10:32:03 PM
XD-Temp-10/22/2013 10:01:49 AM-4caXXXca-0XXX-4XXX-9XXX-62XXXdeXXXX1
vpxuser

Assign a new instance UUID
(5037373c-37e6-d5cd-8dc6-c624f8af7dcc) to XD-
Temp-10/22/2013 10:01:49
AM-4caXXXca-0XXX-4XXX-9XXX-62XXXdeXXXX1
info
22-10-2013 10:32:01 PM
XD-Temp-10/22/2013 10:01:49 AM-4caXXXca-0XXX-4XXX-9XXX-62XXXdeXXXX1
vpxuser

Assigned new BIOS UUID (4237e1e6-49a7-e8ba-
67d4-31616f84df1a) to  on  in
info
22-10-2013 10:32:01 PM
vpxuser

Creating XD-Temp-10/22/2013 10:01:49
AM-4caXXXca-0XXX-4XXX-9XXX-62XXXdeXXXX1
info
22-10-2013 10:32:01 PM
XD-Temp-10/22/2013 10:01:49 AM-4caXXXca-0XXX-4XXX-9XXX-62XXXdeXXXX1
vpxuser

User vpxuser@ logged out (login time: , number
of API invocations: , user agent: )
info
22-10-2013 09:48:29 PM
vpxuser


Filed under: Citrix, VMware

XenDesktop 7: Machine Catalog Creation Error: Object reference could not be set to an instance of the object.

$
0
0


image

image

Fix:  This happens if the XenDesktop 7 Controller is not setup with proper licenses.  Please install appropriate licenses then this error will subside.


Filed under: Citrix

XenDesktop 7: Creating Machine Catalog error: The Specified master VM snapshot could not be found

Installing ActiveX Plug-in: Auto-Download the Citrix ICA Web Client and Embed the Wficat.cab Web Client into a Web Page

$
0
0

How to Auto-Download the ICA Web Client When ICA Embedding is not Used

This section describes the line of code needed to get the ICA Web Client to auto-download without displaying an embedded ICA link. NOTE: This applies only to the Internet Explorer. If you are using Netscape, each workstation has to manually install the Web Client. For more information about Citrix Web Computing, see the Citrix Web site or the documentation supplied with our products.

Typically Citrix associates the auto-download of the ICA Web Client within an embedded ICA link. With the help of this code, when Internet Explorer goes to a page with the Citrix ICA file embedded within it, the client auto-downloads and installs if the Web Client does not already exist on the workstation. Within that embed, the CODEBASE line tells the Web browser where to get the .cab file to unpack and install the ICA Web Client. If you set up your page to launch the ica file (i.e.,Click my application), your Web browser does not get the benefit of having the cab file or the instructions to auto-download the ICA Web Client.

Download wfica.cab from Http://download.citrix.com to a directory on your web server. Add the line below to enable auto-download of the client, when using NFuse this can be added to login.htm or applist.asp: to a dirctory on your web server::

;

How to Embed the Wficat.cab Web Client into a Web Page

This section describes how to embed the Wficat.cab Web Client into an HTML page so that users who do not already have the latest version of the client automatically receive the client when visiting your Web site.

Important:When using NFuse 1.x to push out the web client to a Windows 2000 workstation, wficat.cab version 6.30.1050 or later, Domain Users can authenticate to the NFuse site, and retrieve the applist. However, they will not receive a prompt to install the Web Client whether it is already installed or not. If an Administrator goes through the same process, the prompt to install the client is displayed. This problem would also happen when creating an HTML page and embed the client using the object tag. Unlike the NT 4.0 Security model, the Windows 2000 security model does not allow regular users to install software. Domain users are not able to download a CAB file via internet explorer unless explicitly given permissions (via IEAK or other means). Domain Users are not able to install applications in the program files directory. Power users and Administrators do not adhere to these restrictions.

To embed the Wficat.cab client into a Web page, copy the Wficat.cab file onto your Web server and then add the following HTML to your page:

< pre>

This example assumes that the 6.20.985 version of Wficat.cab has been copied to the document root of the Web server and is accessible at the URL "/wficat.cab." If the Wficat.cab file exists elsewhere beneath your document root, modify the CODEBASE value appropriately.

At the time this document was written, 6.20.985 was the latest version of the Citrix ICA Web Client. A more recent version may be available atwww.citrix.com/download. To trigger a client update for users who already have an older version of the Web client, you must update the #Version=6,20,985,0 syntax in the CODEBASE parameter to match the version of your Wficat.cab file.


A Sample .INF file that is being used by ActiveX installer:

image


Reference:

CTX676151 – How to Install the Citrix ICA Web Client – Citrix Knowledge Center


Filed under: Browsers, Citrix, Repackaging

Installing Citrix XenTools 6.2 on CentOS Linux release 6.0 (Final) from command line

$
0
0

Mount the Xe-Tools.iso from XenServer

SSH to the CentOS Linux system

Mount the Xen Tools:

  • cd /mnt
  • mkdir xe-tools
  • mount /dev/cdrom /mnt/xe-tools
  • verify the xe-tools contents:


        [root@centOSSys1 /]# ls /mnt/xe-tools
        AUTORUN.INF              citrixguestagentx86.msi  citrixvssx86.msi         citrixxendriversx86.msi  dotNetFx40_Full_x86_x64.exe  installwizard.msi  README.txt
        citrixguestagentx64.msi  citrixvssx64.msi         citrixxendriversx64.msi  copyright.txt            EULA_DRIVERS                 Linux              xenlegacy.exe

        [root@centOSSys1 /]# ls /mnt/cdrom/Linux/
        debian-lenny  versions.deb                             xe-guest-utilities_6.2.0-1120_i386.deb    xe-guest-utilities-xenstore-6.2.0-1120.i386.rpm
        install.sh    versions.rpm                             xe-guest-utilities-6.2.0-1120.i386.rpm    xe-guest-utilities-xenstore-6.2.0-1120.x86_64.rpm
        rhel4x        xe-guest-utilities_6.2.0-1120_amd64.deb  xe-guest-utilities-6.2.0-1120.x86_64.rpm  xe-linux-distribution
        [root@centOSSys1 /]#

  • Run the install.sh script: /mnt/xe-tools/Linux/install.sh
  • [root@centOSSys1 ]# ./install.sh

    Detected `CentOS Linux release 6.0 (Final)’ (centos version 6).

    The following changes will be made to this Virtual Machine:

    * update arp_notify sysctl.conf.

    * packages to be installed/upgraded:

    - xe-guest-utilities-6.2.0-1120.x86_64.rpm

    - xe-guest-utilities-xenstore-6.2.0-1120.x86_64.rpm

    Continue? [y/n] y

    Preparing… ########################################### [100%]

    1:xe-guest-utilities-xens########################################### [ 50%]

    2:xe-guest-utilities ########################################### [100%]

    You should now reboot this Virtual Machine.

    [root@centOSSys1 ]#

  • Now restart the VM: shutdown –r now
  • Post restart verify it using the same script:
  • [root@centOSSys1 /]# /mnt/cdrom/Linux/install.sh
    Detected `CentOS Linux release 6.0 (Final)’ (centos version 6).

    The following changes will be made to this Virtual Machine:
      * packages to be installed/upgraded:
        – xe-guest-utilities-6.2.0-1120.x86_64.rpm
        – xe-guest-utilities-xenstore-6.2.0-1120.x86_64.rpm

    Continue? [y/n] y

    Preparing…                ########################################### [100%]
            package xe-guest-utilities-xenstore-6.2.0-1120.x86_64 is already installed
            package xe-guest-utilities-6.2.0-1120.x86_64 is already installed
    [root@centOSSys1 /]#


Filed under: Citrix, Unix Technologies

NVIDIA’s Virtual GPU (vGPU) and Dedicated GPUs (GPU PASS-THROUGH TECHNOLOGY)

$
0
0

VIRTUAL GPU TECHNOLOGY

NVIDIA GRID™ vGPU™ is the industry’s most advanced technology for sharing true GPU hardware acceleration between multiple virtual desktops—without compromising the graphics experience. Application features and compatibility are exactly the same as they would be at the desk.

With GRID vGPU technology, the graphics commands of each virtual machine are passed directly to the GPU, without translation by the hypervisor. This allows the GPU hardware to be time-sliced to deliver the ultimate in shared virtualised graphics performance.

image


DEDICATED GPU TECHNOLOGY

NVIDIA GPU PASS-THROUGH TECHNOLOGY

NVIDIA GPU pass-through technology lets you create a virtual workstation that gives a user all the benefits of a dedicated processor at their desk. By directly connecting a dedicated GPU to the hypervisor, you can now allocate the full GPU and graphics memory capability to a single virtual machine.


image


Source: http://www.nvidia.in/object/grid-vdi-desktop-virtualisation-in.html


Filed under: Citrix, Repackaging

Download XenApp 6.5 OpenGL GPU Sharing Feature Add-on

Redway 3D TurbineDemo Benchmarking in Citrix XenApp ICA session

$
0
0

Environment:

  • Dell PowerEdge R720 BIOS Version 2.0.19 08/29/2013
  • XenServer 6.2 SP2
  • Hotfixes applied: XS62ESP1
  • Host Driver version: 331.30
  • NVIDIA GRID K100 Grapic Card
  • Guest Nividia Driver version: 332.07
  • OpenGL 1.1.0

clip_image002


Redway 3D TurbineDemo installer detecting the NVIDIA graphics adapter

clip_image002[5]


Runs fine in Citrix XenCenter Console session

image


Fails in RDP session with error: RED_DRV_UNSUPPORTED-GPU: the used graphic card is not supported.

image


ICA Session with Java Client Loader from Firefox browser

image


Filed under: Citrix, Repackaging

Creating a GPU sharing lab with NVIDIA + XenServer + XenDesktop

$
0
0

Flowchart of Steps

This document takes you through the simple steps to complete a GPU sharing lab, creating the vGPU, assigning it to virtual machines (VM) and delivering with XenDesktop virtual delivery infrastructure (VDI). The high-level steps involved are outlined as follows:

The flowchart describes the steps following steps required to complete this evaluation:

image

[XenServer operations]

1. Start with a fresh XenServer 6.2 installation on a GRID supported hardware

2. Install Service Pack 1 on the XenServer 6.2

3. Download the NVIDIA GRID vGPU Pack and unzip the contents; install NVIDIA GRID manager in XenServer from the CLI

[XenCenter operations]

4. Create a Windows 7 VM (this will be the base image)

5. From the XenCenter GUI, assign a vGPU type to the base image

6. In the Windows 7 VM:

a. Install NVIDIA GPU guest OS driver (available in the NVIDIA GRID vGPU Pack)

b. Install the XenServer Tools

c. Install the Citrix HDX 3D Pro VDA

[XenDesktop Studio operations]

7. Create a Machine Catalog using MCS to provision new VMs based on the base image

8. Create Delivery Group, assign users, and publish the desktops

[Endpoint/Client operations]

9. Access virtual desktops using Citrix Receiver. No GPU is required on the end-point devices

10. Validate GPU sharing by multiple desktops, using monitoring tools


Filed under: Citrix

NVIDIA GRID driver installation on XenServer host

$
0
0

NVIDIA GRID driver installation on XenServer host

See http://www.citrix.com/go/vGPU for complete documentation for this feature.

The NVIDIA Virtual GPU Manager runs in XenServer’s dom0. It is provided as an RPM file, which must be copied to XenServer’s dom0 and then installed.

Steps for installing the NVIDIA GRID GPU driver for XenServer 6.2 hypervisor environment:

1. Download the NVIDIA GRID vGPU Pack and extract the contents; available on http://www.nvidia.com/vGPU

image 

2. Upload the NVIDIA driver to /tmp directory on the XenServer host using tool such as WinSCP

3. Place the XenServer host into maintenance mode.

4. Log in as root to the XenServer console through SSH

5. Reboot the XenServer.

[root@xs-6 tmp]# reboot

Broadcast message from root (pts/3) (Wed Dec 4 17:34:23 2013):

The system is going down for reboot NOW!

[root@xs-6 tmp]#

6. Once the host is back online, execute the following command to install the NVIDIA GRID GPU driver in the hypervisor:

[root@xs-6 ~]# rpm -ivh /tmp/ NVIDIA-vgx-xenserver-6.2-331.30.i386.rpm

Preparing… ########################################### [100%]

1:NVIDIA-vgx-xenserver ########################################### [100%]

7. Verify if the kernel module has loaded successfully, using following command:

[root@xs-6 ~]# lsmod | grep nvidia

nvidia 8524078 0

i2c_core 20294 1 nvidia

8. Optionally, restart the XenServer Toolstack using the command xe-toolstack-restart. For more info on the xapi toolstack, refer the edocs

[root@xs-6 ~]# xe-toolstack-restart

Executing xe-toolstack-restart

Stopping xapi: … [ OK ]

Stopping the v6 licensing daemon: [ OK ]

Stopping the memory ballooning daemon: [ OK ]

Stopping perfmon: [ OK ]

Stopping the xenopsd daemon: [ OK ]

Stopping XCP RRDD plugin xcp-rrdd-iostat: [ OK ]

Stopping XCP RRDD plugin xcp-rrdd-squeezed: [ OK ]

Stopping XCP RRDD plugin xcp-rrdd-xenpm: [ OK ]

Stopping the XCP RRDD daemon: [ OK ]

Stopping the XCP networking daemon: [ OK ]

Stopping the fork/exec daemon: [ OK ]

Stopping the multipath alerting daemon: [ OK ]

Starting the multipath alerting daemon: [ OK ]

Starting the fork/exec daemon: [ OK ]

Starting the XCP networking daemon: . [ OK ]

Starting the XCP RRDD daemon: [ OK ]

Starting XCP RRDD plugin xcp-rrdd-iostat: [ OK ]

Starting XCP RRDD plugin xcp-rrdd-squeezed: [ OK ]

Starting XCP RRDD plugin xcp-rrdd-xenpm: [ OK ]

Starting the xenopsd daemon: [ OK ]

Starting perfmon: [ OK ]

Starting the memory ballooning daemon: [ OK ]

Starting the v6 licensing daemon: [ OK ]

Starting xapi: OK [ OK ]

done.

[root@xs-6 ~]#

9. Verify the vGPU types are showing up after the driver installation, using the command vgpu-type-list

[root@xs-6 ~]# xe vgpu-type-list

uuid ( RO) : ad32125b-e5b6-2894-9d16-1809f032c5bb

vendor-name ( RO): NVIDIA Corporation

model-name ( RO): GRID K100

framebuffer-size ( RO): 268435456

uuid ( RO) : ee22b661-4aa0-e6e6-5876-e316c3ea09fe

vendor-name ( RO): NVIDIA Corporation

model-name ( RO): GRID K140Q

framebuffer-size ( RO): 1006632960

uuid ( RO) : 2025cc3e-c869-ef44-2757-a1994cc77c8e

vendor-name ( RO):

model-name ( RO): passthrough

framebuffer-size ( RO): 0

10. Exit XenServer maintenance mode.


Source: http://www.citrix.com/content/dam/citrix/en_us/documents/go/reviewers-guide-remote-3d-graphics-apps-part-3-xenserver-vgpu.pdf


Filed under: Citrix

Citrix Xenapp, Dell powerEdge R720, Nvidia GRID K1 setup GPU for 3D applications and Benchmarking

$
0
0

OpenGL status Locally on the Citrix XenCenter Console:

image

image


OpenGL status from ICA session:

image

image

image

image

OpenGL Rendering Test:

image

Test Results:

image

image

Citrix XenCenter Console:

image

image


Citrix ICA:

image


Filed under: Citrix
Viewing all 57 articles
Browse latest View live